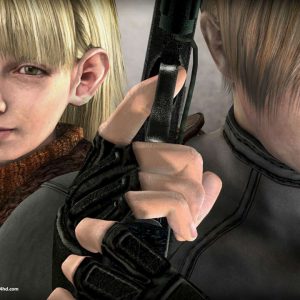
This page contains step-by-step instructions on how to create the Ultima Weapon in Kingdom Hearts III, including a list of materials, orichalcum plus locations, and how to get wellspring, lucid, and pulsing crystals.
Historically, the Ultima Weapon is the ultimate Keyblade in Kingdom Hearts games. It is created using Synthesis Recipes.
To unlock this recipe, you’ll have to had acquired 58 different synthesis materials.
These are the materials you’ll need to craft the Ultima Weapon at any Moogle Workshop:
There are multiple ways to get Orichalcum+, but they are fairly difficult to achieve. Most of these only grant a single Orichalcum+. Click on each instruction in the list for additional details.
Lucky Emblems Orichalcum+[edit]
Get 80 Lucky Emblems to earn an Orichalcum+. See the Lucky Emblems (Hidden Mickeys) Guide for exact details on where to find them.
Flantastic Seven Orichalcum+[edit]
See the The Flantastic Seven Locations and Tips page for each Flan’s location and tips on how to get their top scores. Do this to earn an Orichalcum+.
Arendelle Frozen Slider Mini-Game Guide[edit]
Go to the North Mountain – Mountain Ridge savepoint and talk to Elsa to start this mini-game. Watch the video above for the exact locations of every treasure!
There are 10 treasures to collect, but you won’t be able to collect all of them in one go. You MUST complete a run for the treasure you collected to count. You CANNOT retry until you have seen the results screen!
The High Seas – Undersea Cavern: From this savepoint in The Caribbean, go north. Make your first left, then an immediate right. It’s down a narrow path filled with jellyfish.
Orichalcum+ Chest Location in the Keyblade Graveyard[edit]
Keyblade Graveyard – Badlands: Fast travel to the Keyblade Graveyard – Badlands save point. Take the path south, behind you, to the open area and go through the pink/red portal to the Final World. The chest here has an Orichalcum + inside.
Defeat Bosses in the Eclipse Galaxy[edit]
There are five bosses in the Eclipse Galaxy to defeat with your Gummi Ship. Doing so causes a final, incredibly difficult boss to appear. Defeating it will reward you with an Orichalcum+.
If you start from the Keyblade Graveyard embarkment point, and circle around the giant structure in front of you, you should be able to find all five without issue. Just look out for the Gummi Battle icons on your map. Otherwise, check extra instructions for each below.
These are incredibly difficult battles! Level up your Gummi Ship into at least the 60s for a fair shot.
1: Colossus Pyramid[edit]
Start from The Keyblade Graveyard. This Gummi Battle will be right in front of you. Take the Nebula Line to get spit out next to to. Clash with the Colossus Pyramid.
2: Countdown 11[edit]
From the Keyblade Graveyard, take the Nebula Line to your right, and follow them until you’ve reached the other side of the giant structure. You’ll be able to see a Gummi Battle marker to your left. Take out as many enemies as possible in this battle.
3: Speed Skirmish 11[edit]
Also from the Keyblade Graveyard. This time, take the Nebula Line to the left. Follow the Lines and Boost Rings until you’re near the other side of the giant structure. You should be able to see a Gummi Battle icon to your right.
4: Supreme Warrior[edit]
Start from ECL-03. You should be able to see the Gummi Battle marker on your map. It’s in front of you, but above you – so head in its direction, then go up and around the giant structure to see it.
5: Scarlet Shark[edit]
Also from ECl-03. This one should be the Gummi Battle marker to your left. Just head toward it.
Boss: Omega Machine[edit]
After defeating all five bosses, the Omega Machine will appear on top of the giant structure.
Exploit Moogle Prize Postcards[edit]
You attain Moogle Prize Postcards randomly when you purchase items at the Moogle Shop.
- Purchase items until you earn a Moogle Postcard.
- Go to Twilight Town and save right in front of the mailbox, which is just to the left of the Moogle Shop.
- Turn in the Post Card.
- If you got an Orichalcum+, great!
- If not, go to the savepoint, return to the title screen without saving.
- Load your save and try again.
This may take quite a few tries. Good luck!
You can collect Wellspring Crystals in Monstropolis, The Caribbean, and San Fransokyo. However, the best way to farm Wellspring Crystals is by repeatedly taking on Battlegate 12 in San Fransokyo.
This is an easy, guaranteed way to encounter High Soldier Heartless, which drop Wellspring Crystals.
Make sure to equip your party with as many Lucky Strike skills as possible to increase the chance of enemies dropping items.
See the Battlegates Locations and Guide for more details on Battlegate 12.
These can be synthesized at the Moogle Workshop with the following materials, which is the easiest way to get it:
- 1 Wellspring Crystal – Battlegate 12: See instructions above
- 2 Lucid Gems – Buy from Moogle Shop
- 3 Lucid Stones – Buy from Moogle Shop
- 5 Lucid Shards – Buy from Moogle Shop
You can also get these materials by defeating heartless. Make sure to equip your party with as many Lucky Strike skills as possible to increase the chance of enemies dropping items. The Deputy Keyblade and Lucky Ring are good for this.
The Heartless called Anchor Raider – red pirates that hang from an anchor – also drop Lucid Crystals. We’ve found the easiest way to encounter these is by taking on Battlegate 10 in the Caribbean.
These are the easiest to get by synthesizing at the Moogle Workshop with the following materials:
- 1 Wellspring Crystal – Battlegate 12: See instructions above
- 2 Pulsing Gems – Buy from Moogle Shop
- 3 Pulsing Stones – Buy from Moogle Shop
- 5 Pulsing Shards – Buy from Moogle Shop
You can also get these materials by defeating heartless. Make sure to equip your party with as many Lucky Strike skills as possible to increase the chance of enemies dropping items. The Deputy Keyblade and Lucky Ring are good for this.
Pulsing Crystals are also dropped by enemies in Arendelle. Start at the North Mountain – Foothills, and travel to the top, defeating enemies as you go. Use the North Mountain – Snowfield savepoint to fast travel back to the Foothills and start over. This route will also occasionally reward Wellspring Crystals. However, synthesizing is still much easier.
Was this guide helpful?
