

 Revealed")


It’s time for a second trip to Seattle in The Last of Us Part II Remastered. Originally shipped in 2020, Part II amps up the scope of the series, as well as the violence. The result is a dynamic, stealthy survival horror romp that takes place decades after a world-ending pandemic. It can be a tough game to play, and Remastered also includes a new roguelike mode for those who want an even greater challenge.
How does the roguelike mode work?
If the thought of playing through The Last of Us Part II’s grueling narrative again sounds exhaustiing, the roguelike mode, “No Return,” is here to let you play in TLOU’s stealthy, crafty, and bloody combat sandbox with randomized encounters. You can choose among different characters from the sequel and play through a variety of scenarios. These include Assault mode, where you’ll take down hordes of enemies, Hunted mode, where you must survive enemies seeking you out, and Capture mode, where you must secure critical resources from your foes.
Read more: 11 Essential Tips For TLOU 2’s Roguelike Mode, No Return
Brush up on the first game’s plot
As its name implies, The Last of Us Part 2 is very much a second part. You could play this game knowing nothing of the first and still have a fine time, but narratively, you’ll be lost. It’s best enjoyed if you have at least a moderate understanding of the first one’s main characters and important moments. Luckily, for those who missed it—or haven’t played in seven years—we’ve got you covered:
https://kotaku.com/a-beginners-guide-to-the-last-of-us-1844067596
Play around with the difficulty sliders
The difficulty settings in The Last of Us Part 2 are impressively robust. By adjusting the “challenge” slider, you can change the difficulty wholesale, ranging from Very Light (easiest) to Survivor (hardest). But you can also tweak various difficulty settings piecemeal.
For instance, you can fine-tune enemy aggression, accuracy, and movement speed. You can change how effective your allies are. You can decide how frequently—or infrequently—resources drop. You can even modify how much damage you dish out and receive. Mix and match until you find a setting that works for you. (Note: You can only fine-tune these sliders from the in-game menu, rather than the main menu.)
Check out the accessibility options
Beyond difficulty sliders, there are more than five dozen various accessibility settings, many of which switch things up in major ways.
You can toggle pretty much every input in the game from “tap” to “hold.” You can switch the boat controls (a small yet necessary part of world traversal) to operate more like a traditional racing game. You can make it impossible to fall off fatal ledges. You can tweak camera shake and motion blur within 10-point intervals. You can widen the field of view, and even pull the camera further back from Ellie (a huge help in mitigating motion sickness).
You can also fine-tune specific aspects of combat. You can make it so you’re invisible while prone (as long as you’re not lining up shots). You can minimize weapon sway, make it so enemies won’t flank you, widen the dodge window, and even put combat into a semi state of slow motion.
Save often, and don’t trust the autosave
The Last of Us Part 2 has a relatively forgiving autosave system. Sometimes, it’s a bit too forgiving and will drop a checkpoint in the middle of an encounter—right when your ammo and health are on the fritz. This is no small inconvenience: Yes, you’re technically further along than you were at the start of the fight, but you won’t have the resources required to get out of a serious bind. If anything, the autosave frequency is a hindrance.
Thankfully, the fix is easy. When you’re approaching a space that looks like it’ll have a fight, create a manual save. Storage space permitting, there are no limits to how many manual saves you can create.
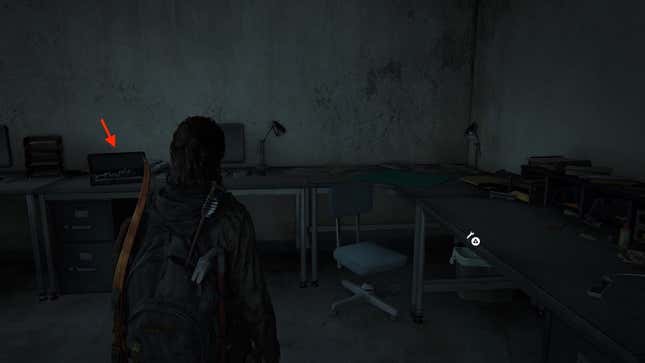
Explore every nook and cranny
Leave no stone unturned. Open every cabinet, bed stand, and dresser. To survive in The Last of Us Part 2, you’ll need every resource you can get your hands on.
In particular, check out every building in Seattle
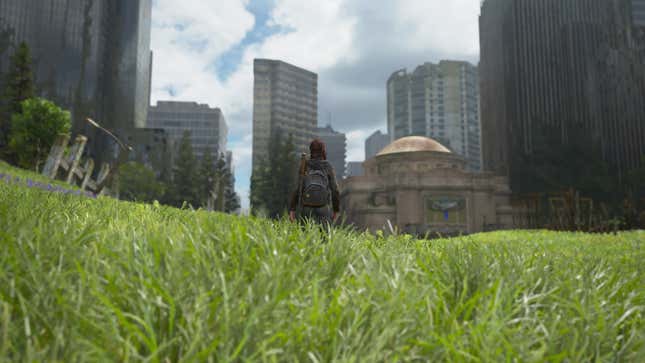
In one of the early chapters, you’ll wind up in a large swath of downtown Seattle (or, uh, what’s left of it). You’re given a horse and a map—one that players of Uncharted: Lost Legacy will surely recognize—and sent on your way. Your goal is simple: Find gas for a generator. (Classic Last of Us, am I right?)
As you explore, you’ll find contextual clues and documents that hint at various treasure troves throughout Seattle. Ellie will circle a location on the map for every clue you discover. If you check out each of those locations before progressing the story, you’ll find a ton of parts, pills, and craftable resources. You’ll also find a secondary sidearm holster. Once that’s unlocked, you’ll be able to switch through two small weapons at the press of a button. It’s an essential upgrade, and is invaluable for early-game encounters. You don’t want to miss it.
For a deeper look at the remnants of downtown Seattle, and the ideal order for tackling these optional locations, check out the following video walkthrough. (And please indulge me by marveling at the headshot at 5:50.)
Don’t miss a single safe
Seattle is littered with hidden safes, all of which require a puzzle of some sort to open up. Don’t ignore any of them: Each safe holds a genuine bounty. Expect to score at least 15 to 20 pills or parts, a respectable amount of rare ammo, and other goodies.
If you see a safe, there’s probably a code nearby. If you see a code or find a note about a safe (or a “cache,” “stash,” “Henry Avery’s long-lost treasure,” what have you), there’s probably a safe nearby. Whatever the case, look around before moving on. More often than not, if you approach a door that requires you to hold down Triangle, that’ll trigger a brief cutscene. Sometimes, you won’t be able to backtrack. Be sure to exhaust all efforts in finding the safe and the code before you cross the threshold.
Use your pills on these skills
When you start out, Ellie only has one skill tree. As you play, you’ll find training manuals that open up the other four. You won’t be able to unlock all the skills in the game in one playthrough, though, so make sure you choose wisely.
I suggest nabbing the first upgrade in the Crafting tree as soon as you can. This will allow you to augment melee weapons, restoring durability to full and doubling attack power. Once you get that, focus solely on the Survival, Stealth, and Explosives trees.
The Explosives tree will unlock explosive arrows (which can take out clickers in one hit) and significantly boost the blast radius of both your molotovs and your trip mines. The Stealth tree will initially teach you how to craft silencers for your pistol. Continuing to pour pills into it will sharpen your sight in listen mode—to the point where you can see through walls—and make it so that your crawl speed is just as fast as your crouch speed. For stealthy encounters, few perks are more helpful.
But nothing is more essential than the Survival tree. Fully leveling up Survival will double your speed in listen mode, double the speed at which you apply health kits, increase your health by 25 percent, and give you a life-saving perk that prevents you from dying in the event of a lethal blow (clickers and bloaters excepted).
Ignore the Precision tree. Though the penultimate ability (holding your breath to stabilize aim) is terrific, it’s not worth wasting pills on the lower-level perks. You can get most of them through weapon upgrades, anyway.
Use your parts on these weapon upgrades
As with skills, you won’t be able to unlock all of the weapon upgrades in one playthrough. Choose wisely. In general, capacity upgrades aren’t worth it. You’ll rarely, if ever, have enough ammo to fill up an entire clip. Why waste valuable currency on something you won’t even be able to use? That’s unethical capitalism even when you’re not in an apocalypse.
Stability upgrades can be helpful, particularly if you don’t unlock any of the skills in the Precision tree. Leveling up the bow’s draw speed is also helpful. That will turn the thing into a viable combat weapon, rather than a tool purely meant for stealth. But the best upgrade in the game is the bolt-action rifle’s damage boost. Nab that one, and you won’t need to land a headshot to take out standard enemies in one hit. (Go figure that it’s the most costly upgrade in the game.)
Most workbenches will have a cache of parts—generally at least a dozen—in close proximity. Search around for a minute before you start upgrading your firearms. That way, you’ll have maximum funds at your disposal to get what you need.
Don’t immediately improve your melee weapons
Each melee weapon has a set number of uses. Land five hits with a crowbar, for instance, and it’ll break. But upgrading it will restore any missing durability and make it more powerful. (An upgraded melee can take out standard enemies in one hit, rather than two.) You’ll get the most bang for your buck by waiting until there’s just one use left before upgrading.
P.s., A melee weapon can shatter glass—windows, cooler doors, pastry cases, that sort of thing—without wasting a precious use.
Craft to make room for more resources
There are six resources in The Last of Us Part 2: alcohol, binding (tape), blades, canisters, explosives, and rags. You can only hold three total for each one. While exploring, if you’re full up on one resource and come across some more, craft something to free up room in your inventory.
Tape is more precious than gold
In The Last of Us Part 2, nothing is more valuable than tape (“binding,” if you must use the game’s parlance). With tape and some blades, you can upgrade a melee weapon. That same combination also crafts more arrows, which can take out standard enemies in one hit. Pair tape with explosives, and you’ll get explosive arrows. Those need no explanation.
It’s not that tape is the most versatile ingredient. (Canisters, rags, and explosives are also requisites for three recipes each.) It’s that tape is always, always in short supply. Whenever you need to craft some arrows, too bad, you’ll be out of tape. The number of times you’ll open a dusty drawer, hoping for—begging for—tape, just to find yet another pile of rags!
Molotovs won’t instantly give away your position
Some stealth tools are obvious: A silenced pistol, for instance, or the bow-and-arrow. One secret stealth weapon? The molotov. You can take out most enemies in one hit without revealing your location. Human enemies will say something along the lines of “It came from over there,” and head over to check things out, but your exact location won’t be revealed. Just crawl away to a different corner.
Use guns as a last resort
At moderate difficulty, ammo is scarce in Part 2. Whenever possible, try to take out enemies without firing a single bullet. Toss a molotov. Use a melee weapon. Sneak up behind foes for one-hit stealth kills. Try your luck in a fist fight. (Bonus tip: Spam L1 to dodge 90 percent of melee attacks.)
On the flipside, if the game starts feeding you a ton of ammo, you can bet your tape stash that a big fight is coming up. In the ensuing wide-open arenas, don’t worry as much about conserving ammo. Once the area is cleared, you’ll be able to recoup all of your expenses, so long as you search every drawer before moving on.
By the way, there’s an easy tell for when a battleground is cleared of enemies. Rather than an obvious musical cue, one of the characters will generally remark on what they just went through: “Was that all of them?” “I think we got ‘em all,” or, sometimes, possibly echoing what you’re thinking, “Fuck.”
Stealth is an art, not a science
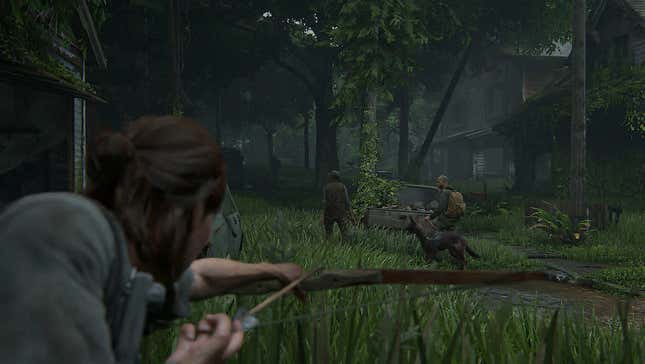
Plenty of games developers throw around words like “dynamic stealth” in marketing materials. The stealth in The Last of Us Part 2 is truly dynamic. There’s no awareness meter. Enemies don’t have helpful yellow-to-orange-to-red arrows hovering over their heads. Even after playing through this game one-and-a-half times, I can’t say for sure what causes an enemy to spot you, or what constitutes viable cover. Stealth in this game is really all about feeling. You’ll just have to go with your gut.
There’s no shame in running away
In combat, you’ll inevitably get overwhelmed from time to time. When that happens, turn tail and retreat as fast as you can. You won’t be able to leave an encounter, but you will be able to run away from your enemies. If you hold down Circle while running, you’ll dive into a prone position. One easy retreat strategy? Sprint and dive into tall grass. Depending on how removed you are from an enemy’s line of sight, they’ll “lose” you, at which point you can reassess and re-engage.
Don’t try to run toward enemies
Rushing an enemy might seem like a good idea. Most melee weapons are instant kills, and you’ll conserve ammo, too. But anyone wielding a gun will suddenly turn into Hawkeye: all of their shots are guaranteed hits. You can keep sprinting at them all you want, but they’ll keep landing shots.
Similarly, if you sprint head-on toward a clicker, you’re in for a world of hurt. Even with expertly timed dodges, you won’t be able to deal any damage. They’ll counter any attacks from the front with a one-hit kill. Immolate them with molotovs, blast away with the pump shotgun, or land two headshots with a more precise weapon. Or, if you can sneak up behind them, take them out in one hit with Ellie’s knife. But be warned: The ensuing screech might wake up any nearby “sleeping” clickers.
Take breaks
Terrific as it is, The Last of Us 2 is a seriously grim game. You don’t want to mainline this one. I won’t suggest exact hour counts, but at least walk away whenever the screen fades to black after a dramatic cutscene. Go pet a kitten, or eat a cupcake, or smell some flowers, or do anything else. Then return to Part 2 the next day. It’s not going anywhere.

Once you’ve reached a certain point in the game, things change. You might initially think of it as a brief sojourn, but really you’re only halfway to the end. The following advice should help make the rest of your journey a bit easier. For those who haven’t reached the part—you’ll know it when you hit it—and would like to keep a tight lid on any and all plot twists, turn back now.
Don’t play Abby like you’d play Ellie
When you first start playing as Abby, there are noticeable differences. Since you’re in it for the long haul, it’s best to get used to the changes sooner rather than later. For starters, Abby’s arsenal is more combat-focused. She can both dish out and take more damage, particularly if you level up the Field Tactics and Close Quarters skill trees. But she can’t stealthily take out clickers, at least not without a shiv. And, instead of molotovs (relatively quiet), she uses pipe bombs (not quiet at all).
In short, playing as Abby means you can focus a bit more on the “action” part of the “stealth-action gameplay.”
Just like Ellie, though, you won’t be able to unlock all of the skills or upgrade all of the weapons in one playthrough. Choose wisely. The Field Tactics skill tree—Abby’s first available one—is worth many of your pills. You’ll sharpen the clarity and expand the range of listen mode. You’ll unlock the ability to steady your breath, key for maximizing the crossbow’s stealth potential. And, most importantly, you’ll increase Abby’s health by 50 percent.
As far as weapons, you’ll want to level up the hunting pistol as soon as possible. Increasing the damage allows you to take out most enemies with a body shot. Slapping a scope on it is enormously helpful in a way that needs no explanation. And if you unlock the second level of Abby’s Firearms skill tree, you’ll be able to craft ammo for it—an invaluable perk for a game that regularly deprives you of such a resource. (Bonus: Pouring points into the Firearms tree will allow you to craft incendiary shells for the shotgun, meaning you’ll have a steady supply of powerful ammo for that gun, too.)
Don’t get lulled by the semi-automatic rifle. Sure, it’s powerful—but it burns through ammo.
Lean on Lev’s spotting abilities
During “Seattle Day 2,” and for the rest of her campaign, Abby teams up with a young ex-Seraphite named Lev. Lev is an absolute ace with a bow and arrow. He’s also terrific at spotting enemies, something none of Ellie’s allies do. When you’re sneaking, wait until Lev points out a nearby enemy. An arrow should pop up over their head, Far Cry-style. The stealth sections then become a matter of landing a headshot with the crossbow or a silenced pistol. Hope you leveled up the Field Tactics tree!
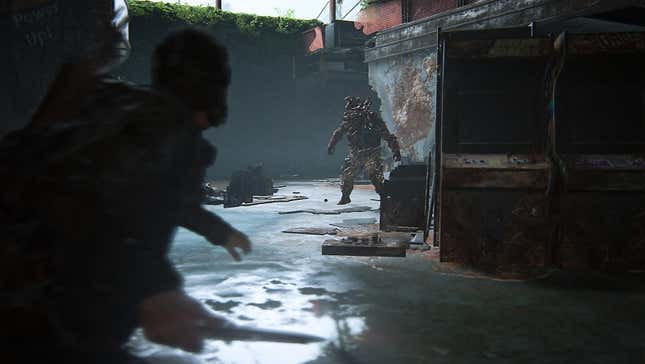
Watch out for the new Infected classes
During Abby’s chapters, stalkers get a serious upgrade: Rather than hide in the shadows, they can pop out of cordyceps growths in the spore-infested areas of Seattle. There’s no shortage of scares in this game; few things cause more of a fright than a stalker leaping unexpectedly out of the wall. As resources allow, try to always keep a shiv on hand. That way, even if you’re caught unaware, you won’t lose any health.
Shamblers are introduced late in Ellie’s storyline, and become far more common in Abby’s chapters. Like bloaters (the big Infected), shamblers have a ridiculous amount of health. Get too close, and they’ll burn you with a cloud of overheated spores, quickly depleting your health. A few incendiary rounds can take these big beasts down. An upgraded hunter pistol works wonders, too. (There’s two more reasons to level up the Firearms tree.) Or you just could use my personal favorite trick: run.
Most fistfights follow a pattern
At certain points in Abby’s storyline, you’ll find yourself in one-v.-one brawls. If you’ve played Uncharted 4, these moments play out much like the mini-boss encounters against Nadine Ross, the big difference here being a total absence of quicktime event cues.
Most of these encounters follow one simple pattern: Enemies will swing three times before pausing. The realism of Naughty Dog’s technical wizardry, while mind-blowing, can make it so such patterns are tough to pick up on. And sure, there are tweaks and differences from bout to bout (notably, during the final fight). But once the pattern clicks, these sections become a total breeze. Just be sure to time your hits after their third attack. Otherwise, your enemies will successfully counter.
Don’t feel bad about cheesing your way through that boss
After you return to the hospital as Abby—the same hospital where Ellie shirks her morality to wring information out of Nora—you’ll quickly find yourself in dark, dusty hallways that just scream “shit is about to go down.” Sure enough, shit indeed goes down, and you’ll find yourself up against an undead nightmare called the Rat King. Roughly 30 years old, the Rat King is one of the first Infected from Seattle’s initial outbreak. Over the course of three decades, it’s become a Hummer-sized amalgamation of runners, clickers, stalkers, and one very angry shambler.
Before you ask, yes, you have to kill it. There’s no escaping from that boss chamber. You’ll have to pour every bullet in your inventory into the Rat King—and then some. (Thankfully, there’s plenty of extra ammo in the hospital beds and medicine cabinets.) But there are a few tricks you can deploy to make things easier.
First, be sure to thoroughly survey the space at the start. There’s a long hallway in the back, which you can use to create some distance. You’ll want to explore before the Rat King enters its second stage—when it breaks off a wayward Infected—to get a good lay of the land. Trying to get a sense of the space is tough enough when there’s one monster chasing you, let alone two. Understanding the full breadth and shape of the room is imperative in beating this battle.
Second—and I know this sounds taboo—consider scrumming your way through. Those aforementioned save issues actually come in quite handy during this boss fight. After an autosave, you’ll start back up with about a third of your health bar. If you’re on the brink of death and lack the rags and alcohol for a health kit, fire all of your remaining ammo into the Rat King and let it kill you. That should give you a nice health boost.
If all else fails, turn the difficulty down a notch. It’s hard to understand what’s going on when you’re succeeding in this fight. It’s even harder when you’re repeatedly getting your face punched off by a 17-headed scream factory. There’s no shame in tackling it on a lower difficulty level.
Same for that sniper section
When the sniper has you pinned in the parking garage, stay in the stairwell and take out all the Infected from there. Once they’re taken out, run for it. Trust me: This tactic will save you much, much grief. Well, in the gameplay. No advice can save you from the grief from the plot.
More things to click(er) on:
https://kotaku.com/the-last-of-us-part-ii-the-kotaku-review-1844006193
https://kotaku.com/here-s-the-deal-with-the-last-of-us-part-2-1844086157


